You can now create multilingual chatbots for your brand and engage with more users from your websites.
For creating a Chatbot/Widget, you must have a project created. To know more about how to create a Project, click here.
1. Go to Widget Page
To create a chatbot from your project, go to the Widget page in the left menu. After that click on the Create Widget button to create a new widget.
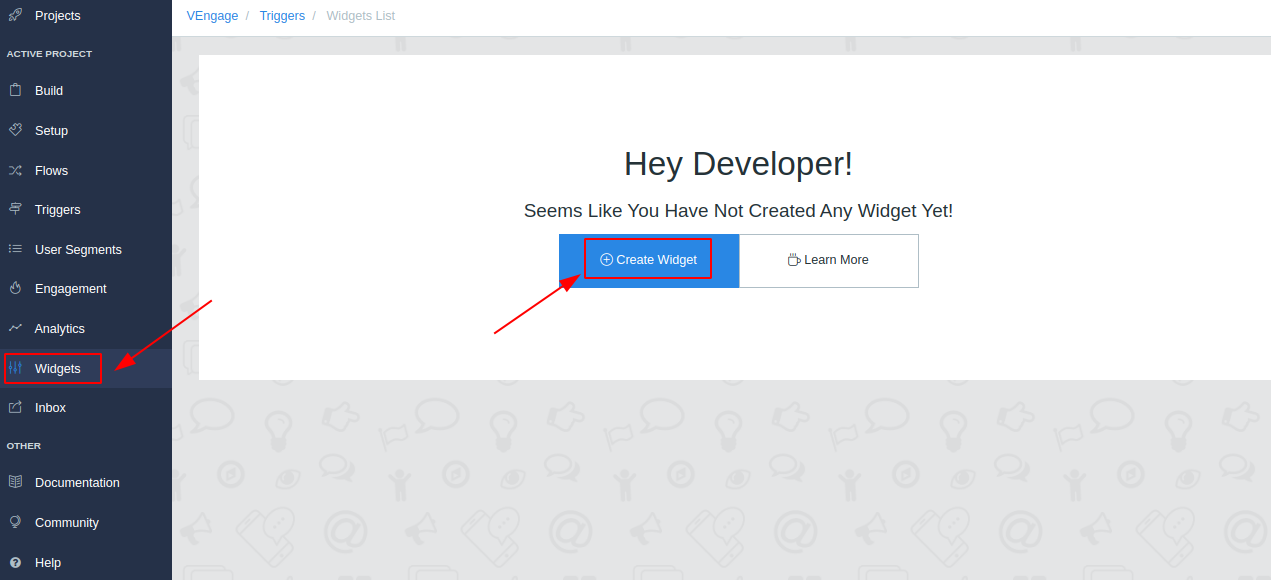
Chatbots are refereed to widgets because these can be embedded in an existing website just like a widget.
2. Fill all the details
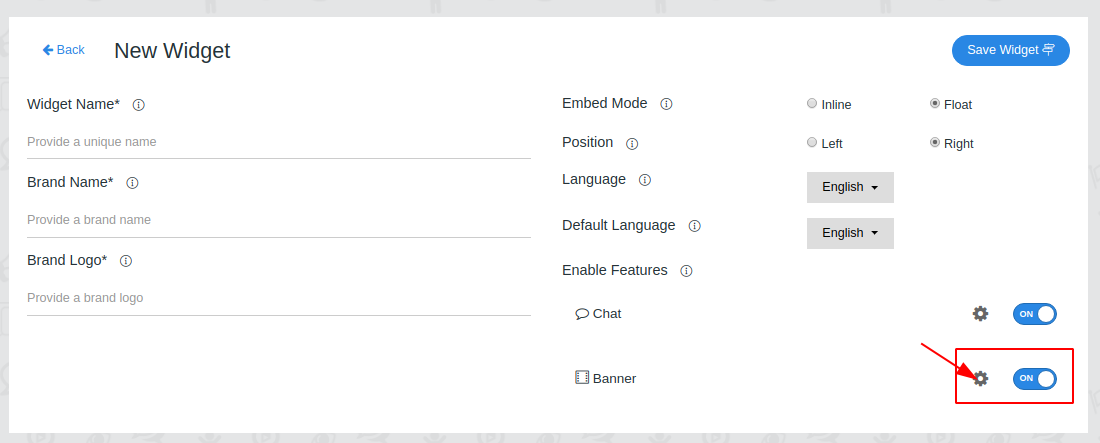
On Clicking the Create Widget button, on new page will open. Fill in the required details needed for then click on the Settings Icon.
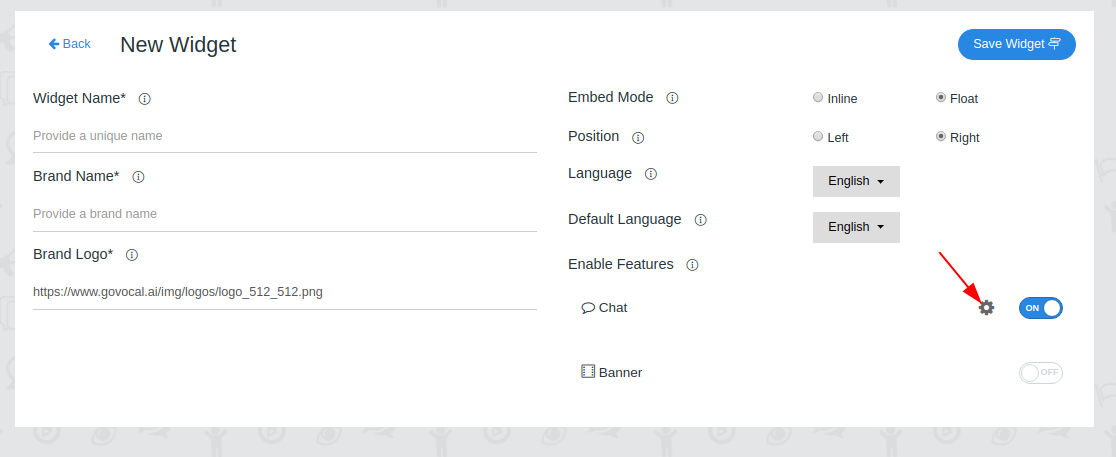
Widget Name : Provide a unique name for your widget.
Brand Name : Provide your Brand Name to be displayed on the widget.
Brand Logo : Provide a https url of your brand logo that will be visible on your widget.
Embed Mode : You can choose how to embed your chatbot in your website.
Float : Embed your widget in the form of a chat bubble.
Inline : Embed your widget in the form of an inline iframe.
Position : Position of the chat bubble to be placed on the left or right of the window.
Language : Select the language for which you want to use your chatbot.
Default Language : Select the default language among the language you chose for the widget.
Enable Features : You can enable features for your widget such as Chat and Banner.
Chat : You can enable the chatbot feature for your widget.
Banner : You can also enable the Banner feature for your widget.
3. Using Chat feature
On clicking the Settings icon next to the Chat feature, a dialog will pop up for you to edit some information.
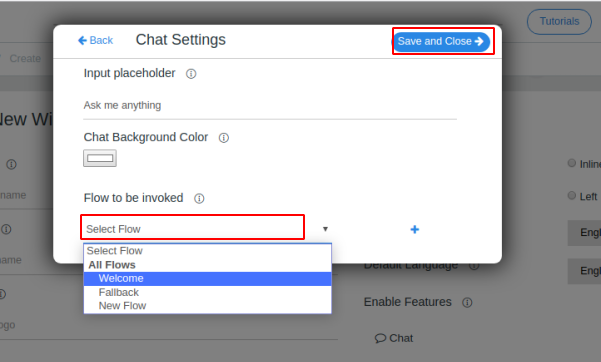
Input Placeholder : This is the text that will be shown initially, in the input box.
Chat Background Color : Set the background color for your app.
Flow to be invoked : You can choose the flow to be invoked when the user opens the Chat window.
Make sure you have already made a flow. For more information on how to create a flow, click here.
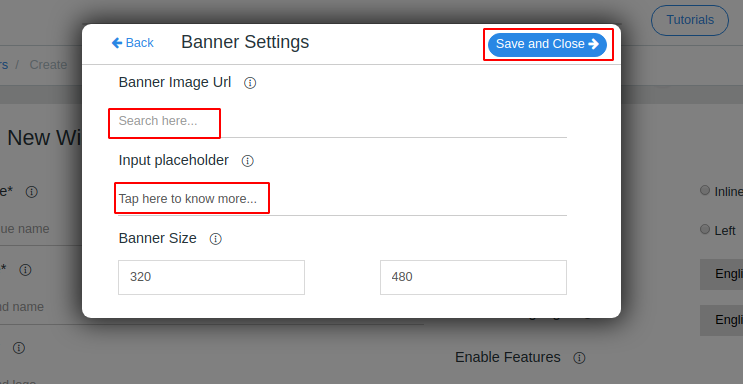
4. Using Banner Feature
You can use the Banner feature by enabling it and adding the required information in the pop up menu.
Banner Image Url : Add an image Url for the image to be shown in the banner.
Input Placeholder : Text to be shown initially in the input text holder.
Banner Size : You can choose the size of the banner to be shown.
Don’t forget to click Save and Close to save your changes.
5. Using the Widget
On clicking the Save Widget, it creates/updates the widget.
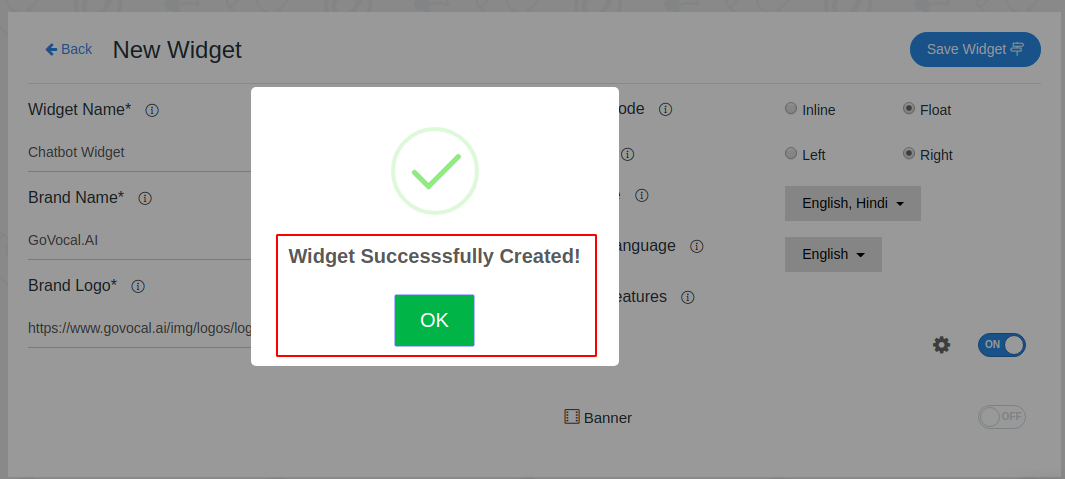
Now you can see the options on the right of you screen.
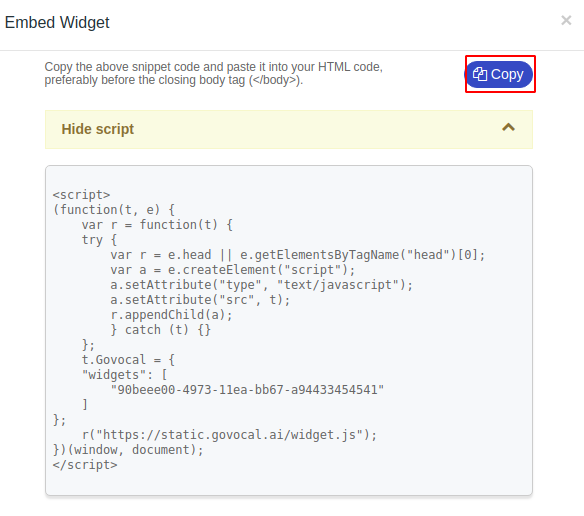
Embed Widget : This is the code that contains the code for embedding your widget in a website.
Edit Widget Details : You can click this icon and edit the details for your widget.
Delete Widget Permanently : If you no longer need a widget, you can delete it.
Now click on the embed widget icon. A pop up menu will come with the code to embed your widget.
Click on the copy button to copy the code. Paste the code into your HTML code, preferably before the closing body tag (</body>).